The first challenge in learning how to photograph Hoover Dam is scale. The dam is enormous, the Black Canyon walls are steep, and the Colorado River, highway bridge, power facilities, and visitor crowds all compete for attention. A great photo comes from deciding what story you want to tell before you raise the camera: the massive sweep of the dam, the engineering details, the canyon landscape, or the people experiencing it.
For visitors coming from Laughlin or exploring Southern Nevada and Northwest Arizona for the day, Hoover Dam is especially rewarding because it changes character throughout the day. Morning brings cleaner light and smaller crowds. Late afternoon adds warm canyon color. Midday can be harsh, but it is excellent for graphic shadows, bright blue water, and crisp architectural lines.
Start with the right viewpoint
There is no single best place to photograph Hoover Dam. Each viewpoint creates a different image, so give yourself time to see more than one angle rather than rushing out for a quick snapshot.
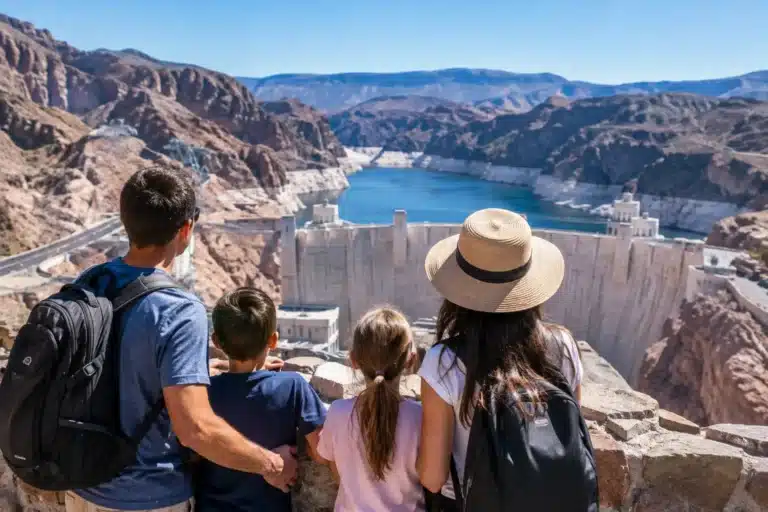
The pedestrian walkway on the Mike O’Callaghan-Pat Tillman Memorial Bridge is the classic wide scene. From high above the canyon, you can photograph the full curved face of the dam, Lake Mead beyond it, and the river far below. It is the place for a dramatic sense of scale, especially with a person near the railing for perspective. A wide-angle lens works well here, but do not go so wide that the dam becomes a tiny strip in an oversized frame.
Closer to the dam, look for compositions that highlight its Art Deco design, curved concrete walls, intake towers, clocks, statues, and repeating patterns. The view from the dam itself feels less like a landscape photo and more like an architecture and history study. A moderate zoom lets you isolate those details without including every sign, vehicle, and visitor in the scene.
From the Arizona side, the view can reveal a different relationship between the dam, bridge, and canyon. Conditions and access can change, so follow posted instructions, use designated walkways, and allow time for parking and security procedures. The best image is never worth stepping into a restricted area or stopping where traffic needs to move.
How to photograph Hoover Dam in the best light
Early morning is usually the easiest time to work. The air is often clearer, the sun is lower, and you have a better chance of photographing viewpoints before the busiest part of the day. Depending on the season, one canyon wall may still be in shadow while the other catches sunlight. Use that contrast intentionally instead of waiting for perfectly even light that may never arrive.
Late afternoon can be just as beautiful, particularly when warm light reaches the rock and concrete. The trade-off is that the dam and canyon can fall into deep shadow sooner than expected. Keep an eye on the light as it drops behind the canyon rim. If your goal is detail in the dam face, expose carefully so the bright sky does not force the structure too dark.
Midday is often dismissed by photographers, but it has its uses at Hoover Dam. Strong sun makes the dam’s curves, railings, towers, and decorative features look bold and clean. It is also a good time for close-ups, black-and-white images, and high-contrast compositions. When the view feels too bright and flat, turn away from the widest scene and focus on texture, symmetry, and shadow.
If you are traveling on a fixed day-trip schedule, do not let imperfect light stop you. Weather, season, and tour timing all shape the experience. A clear, bright desert afternoon can still produce memorable images when you choose a composition that suits the conditions.
Bring a simple, useful camera setup
You can photograph Hoover Dam well with a phone, compact camera, or interchangeable-lens camera. The key is using what you have with purpose. A phone is excellent for wide views, panoramic images, and quick portraits. Clean the lens first – desert dust and fingerprints show up quickly against blue sky and bright concrete.
For a dedicated camera, a wide-to-normal zoom is the most versatile choice. Something in the roughly 16-35mm or 24-70mm range, depending on your camera system, covers most of the experience. A telephoto lens is helpful if you enjoy graphic details: turbines and towers in the distance, bridge lines, cliff textures, or compressed canyon views.
A polarizing filter can deepen a pale sky and reduce glare on some surfaces, but use it carefully with very wide lenses. It can create an uneven, overly dark patch of blue across the frame. In the strong desert sun, a lens hood and a microfiber cloth are often more useful than carrying a bag full of accessories.
Tripod rules and space limitations may vary by location, and busy walkways are not a good place to spread out equipment. Handheld photography is usually the practical choice. If you want a slower shutter speed for moving water or low-light work, check current site guidelines before bringing support gear and never obstruct a walkway.
Compose for scale, not just the postcard view
The familiar bridge-over-dam image deserves a place in your camera roll, but the strongest Hoover Dam galleries include variety. Start wide, then deliberately get closer. Photograph the curvature of the wall, the patterned concrete, the brass-colored details, the canyon rock, and the people who make the structure feel even larger.
A useful approach is to make three kinds of frames at every stop. First, take the establishing photo that shows the whole setting. Next, find a medium composition that connects the dam to the bridge, towers, or canyon. Finally, make a detail image with a strong shape, texture, or line. Those images work together much better than twenty versions of the same wide view.
Look for leading lines in railings, roads, bridge cables, and the dam’s sweeping edge. Keep horizons level, especially in wide canyon scenes where a tilted frame is obvious. If the dam appears to lean backward because of a very wide lens, step back and use a slightly longer focal length. That small adjustment often makes the architecture feel more powerful and natural.
People can improve the scene when used with intention. A traveler looking over the canyon, a family walking along a viewpoint, or a guide sharing a story can bring warmth to a photo that might otherwise feel like a record of concrete. Ask before making close portraits of strangers, and be mindful that popular viewpoints are shared spaces.
Use phone features without overprocessing
Modern phones handle Hoover Dam surprisingly well, especially in bright daylight. Tap the brightest area of the screen and lower exposure slightly before taking a wide view. This protects the sky and helps preserve texture in sunlit concrete. If your phone has a RAW or Pro mode, use it only if you plan to edit later. Standard images are often easier to share immediately.
Panorama mode can work from the bridge viewpoint, but move slowly and keep the phone level. It is best for a broad canyon scene, not for a close view of the dam where vertical lines may bend. Portrait mode is more useful for a traveler standing near a railing than for the dam itself.
Avoid pushing saturation until the water looks unnatural or the canyon turns orange. Hoover Dam already has bold color: pale concrete, dark rock, blue water, and expansive desert sky. A light edit that corrects highlights, shadows, and straight lines is usually enough.
Plan for heat, wind, and the pace of the visit
The desert can make photography harder than expected. Summer heat drains batteries and patience, while wind can make hats, maps, and lightweight gear difficult to manage. Carry water, wear sun protection, and keep your camera accessible rather than buried in a bag. You will notice more quick opportunities when you are comfortable and ready.
Parking, walking distances, security checks, and crowds can all affect how long you have at a viewpoint. Build in extra time if photography is a priority. A guided small-group outing can be a comfortable option for visitors who would rather focus on the scenery than navigation, parking logistics, and the drive. Desert Wonder Tours can also help turn a Hoover Dam stop into a fuller regional day of canyon views, Route 66 character, or Laughlin-area sightseeing.
Before you leave, take one last look without the camera. The best Hoover Dam photographs usually come after you have noticed how the bridge hangs over the canyon, how the dam bends across the river, and how small every person looks beside it. Let that sense of scale guide your final frame, then put the camera down long enough to enjoy the view you came to see.